Using GPG with Smart Cards
Using GPG with Smart Cards

As a software developer, you will eventually encounter asymmetric cryptographic keys, whether it's to authenticate with an OpenSSH server, sign Git commits or access encrypted data.
Many guides explain how to use OpenSSH while storing private keys on individual machines, generating new keys here and there and moving them between machines and environments. Not only is this tedious, it is also a major point of failure in terms of security.
If you have had previous experience with encrypting messages, you might have already stumbled upon another asymmetric cryptographic solution: OpenPGP.
PGP keychains can not only be used for authentication but also for encryption, decryption and signing. GnuPG uses an agent architecture in which gpg-agent handles private-key operations and can also emulate an OpenSSH agent, allowing you to use the keychain for OpenSSH authentication.
Using GnuPG allows us to use one keychain for both OpenSSH and PGP, reducing the administrative burden while also supporting hardware smart cards to prevent secrets from being stolen when using keys in different places.
This guide will show you how to generate a keychain using GnuPG and transfer it to a smart card while also keeping a backup of the secret keys for disaster recovery.
Approaches
In general there are multiple options to handle the generation of keychains when using hardware smart cards, two of which are:
A) Generate Keys Directly on the Smart Card
Modern smart cards offer the ability to generate the keychain directly on the smart card and to perform cryptographic operations directly on the device, so the secret key material never leaves the secure environment of the smart card hardware. This means that the secret keys cannot be extracted from the smart card, even if the system used to generate the keychain has been infected with malicious software.
B) Generate Keys in a Secure Environment
This approach consists of creating a new keychain by generating the secret keys on a normal computer running a general-purpose operating system such as Windows.
Generally, it is advised to use a so-called air-gapped system, which is a computer that is first prepared, then physically disconnected from all networks and formatted after use - this eliminates any possibility of leaking the newly generated keychain due to malicious software being included on the air-gapped system.
Why we use approach B
While generating the keychain directly on the smart card hardware offers some security benefits, for our specific scenario we are going to use a secure, air-gapped system to generate the keychain.
This does provide the ability to create a backup of our secret keys that can be used to restore our keychain should disaster strike. This is especially important in scenarios where we are dealing with encrypted data such as messages and files, where losing access to the keychain means losing access to the aforementioned data.
While enterprise- and server-grade smart card hardware may support backups of the card's secure environment, these devices have one decisive drawback: They are very expensive. Unless you need their additional features, the cost may not be justified compared to simply generating your keys in a secure environment, such as an air-gapped system.
Guide
Installing Gpg4win
Download Gpg4win from the official website: Download Gpg4win
Run the downloaded executable and follow the installation instructions. It is recommended to keep the default settings, however, for this tutorial especially Kleopatra must be selected in the installer as a component to be installed as we will use that software for the remainder of the guide.
Creating the OpenPGP Key
Generate the Primary Key
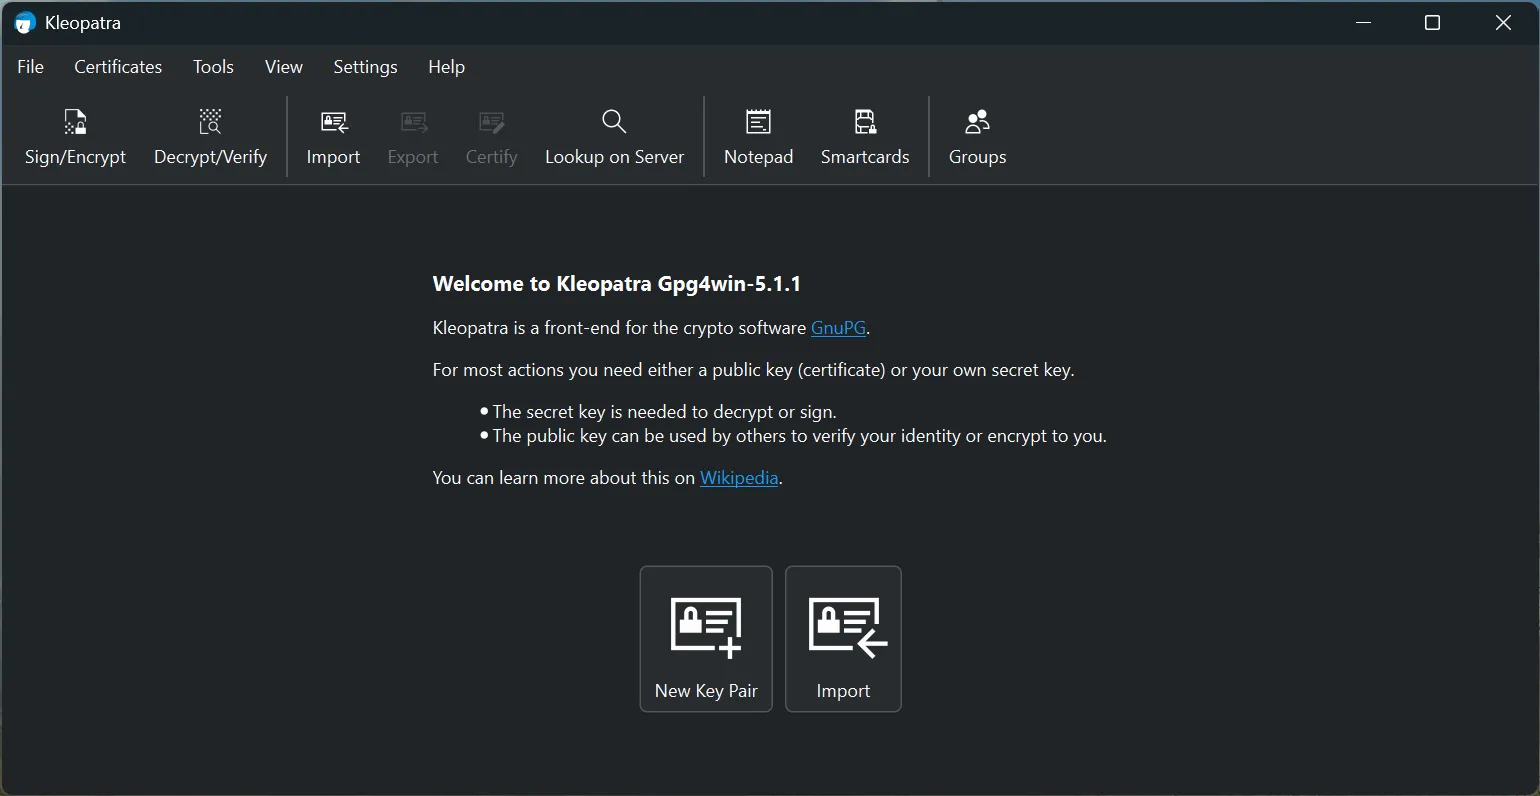
Start the Kleopatra software and click on the "New Key Pair" button of the main screen.
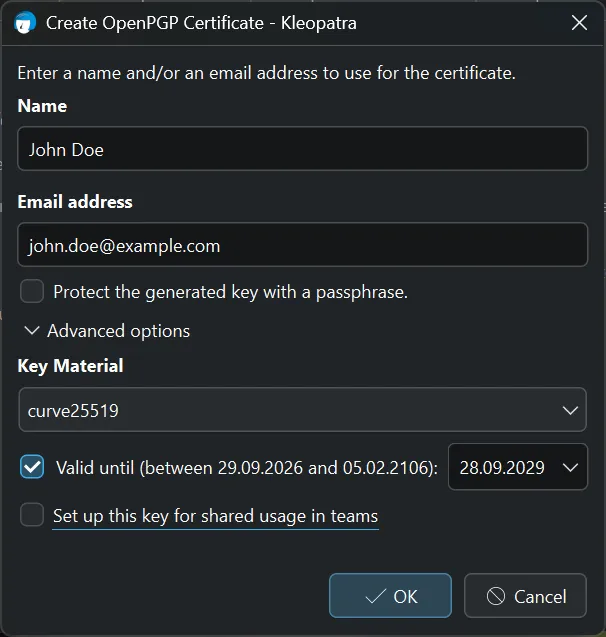
Enter your name as well as the email address related to this identity. Also ensure you have the "curve25519" Key Material selected, as this is the recommended default by the GnuPG team.
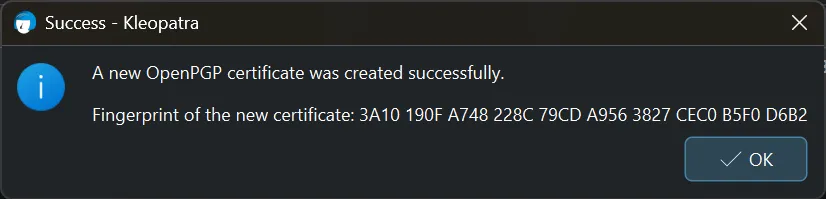
Follow the instructions and note the fingerprint of the newly generated identity, especially the last four blocks for quick identification later on.
Add an Authentication Subkey
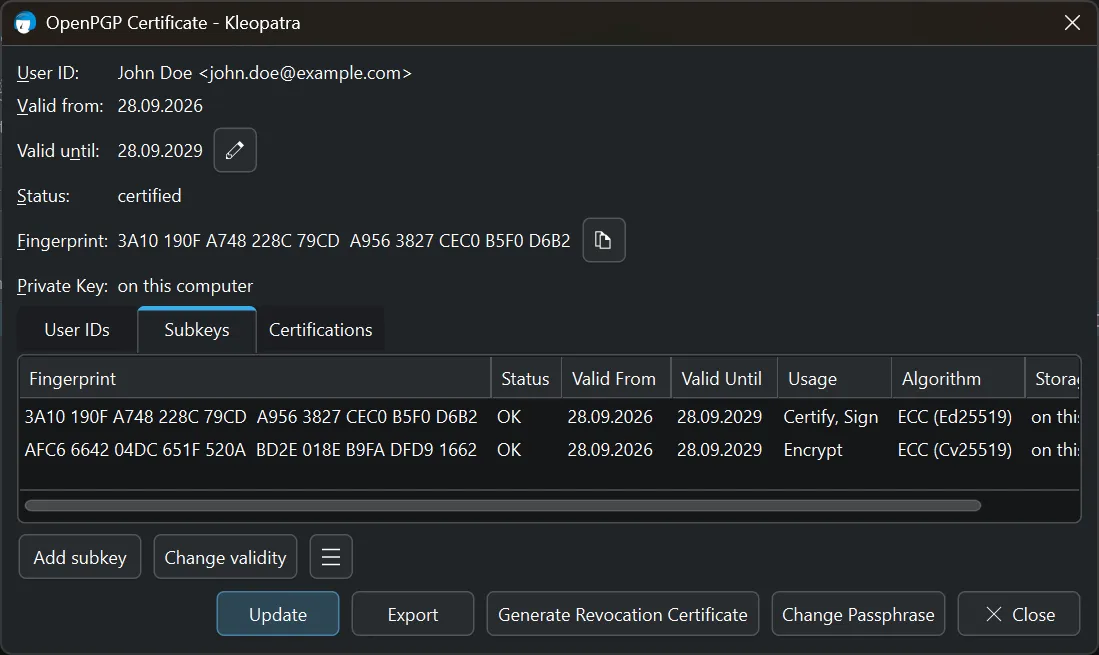
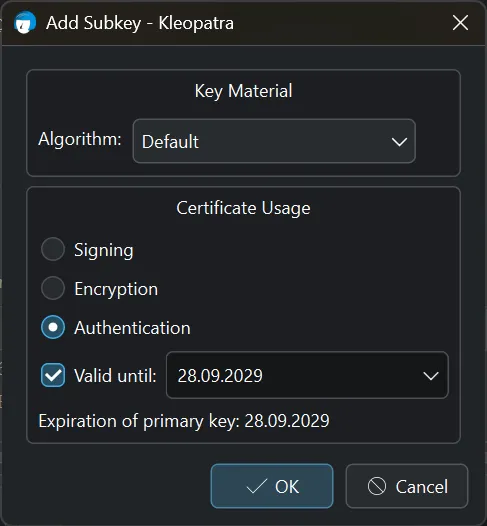
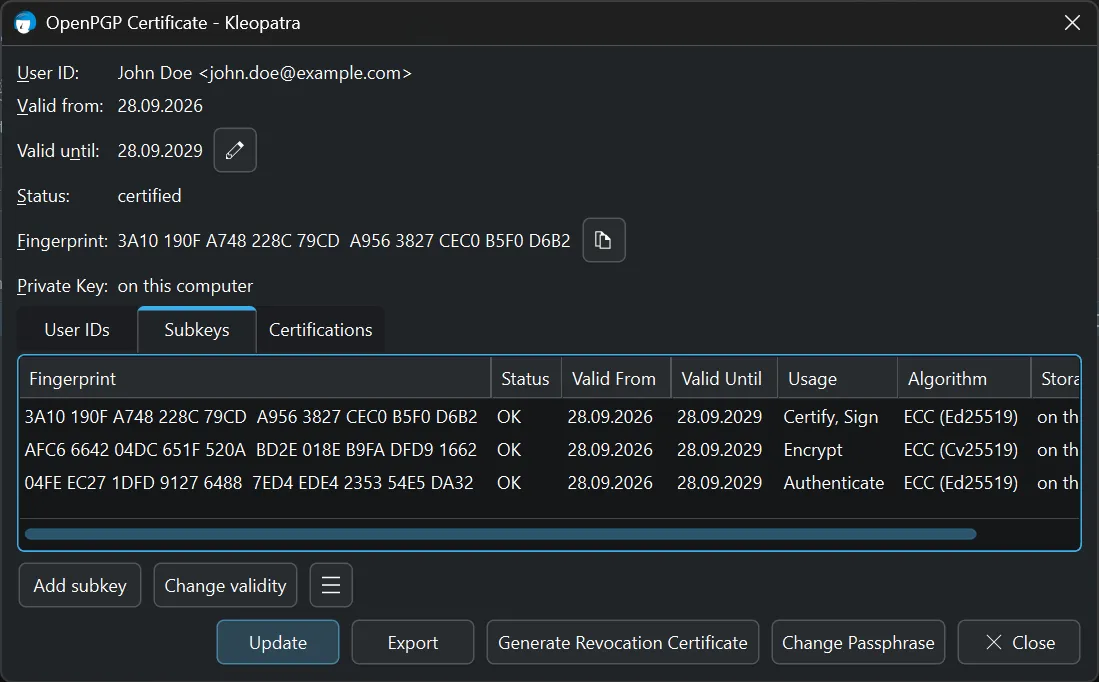
Right-click the newly generated Key Pair on the main screen and select "Details" from the context menu. Navigate to the "Subkeys" tab in the newly opened window and click the "Add Subkey" button on the bottom.
Ensure that the "Default" is selected as the Key Material and "Authentication" is checked as the Certificate Usage.
Now, the Subkeys list should also include a key that can be used for authentication purposes such as OpenSSH.
Copy to Card & Backup
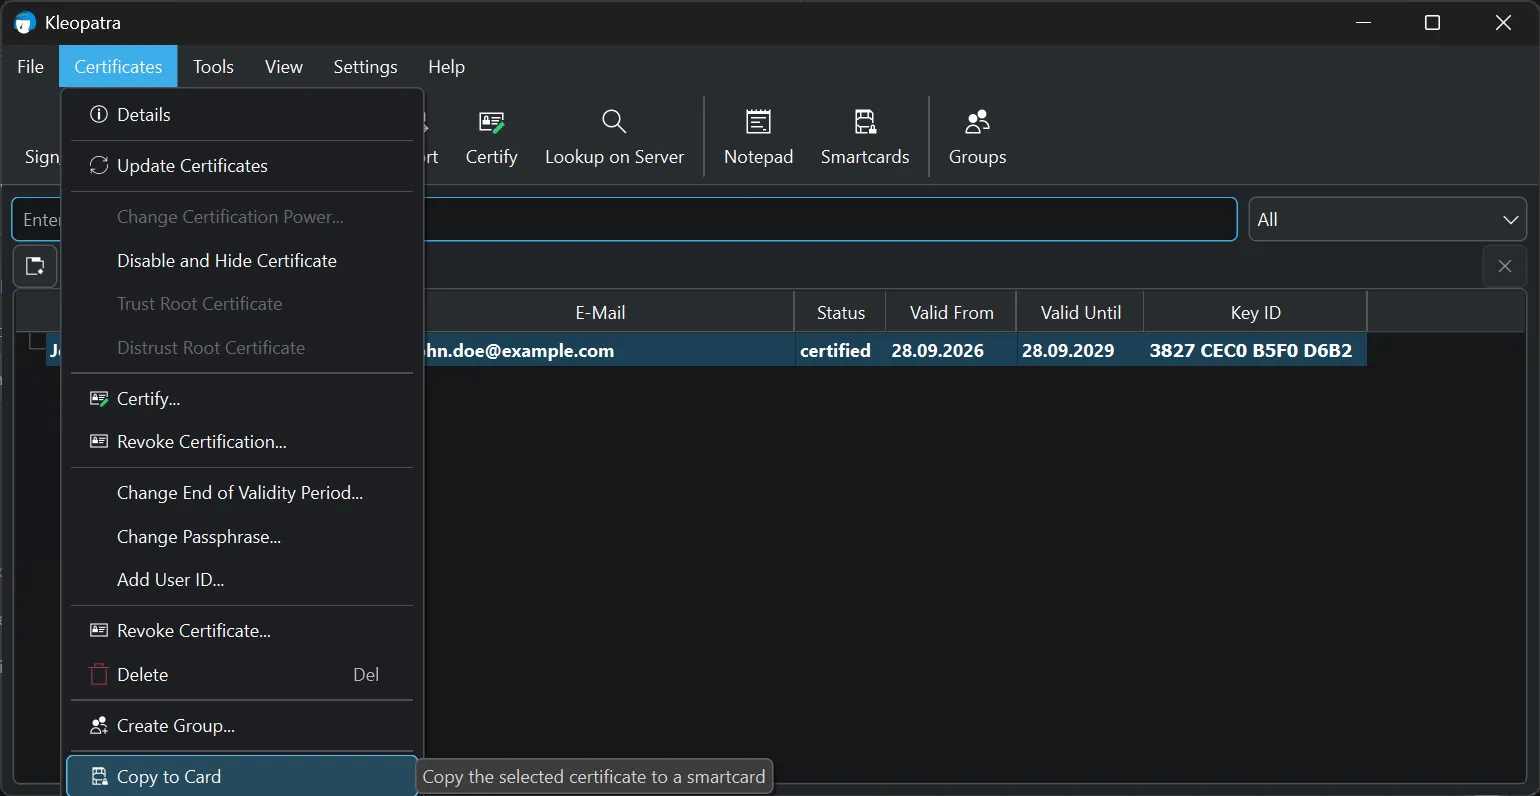
Select the newly generated key pair in the main screen, then click on "Certificates" in the toolbar and select "Copy to Card" from the context menu.
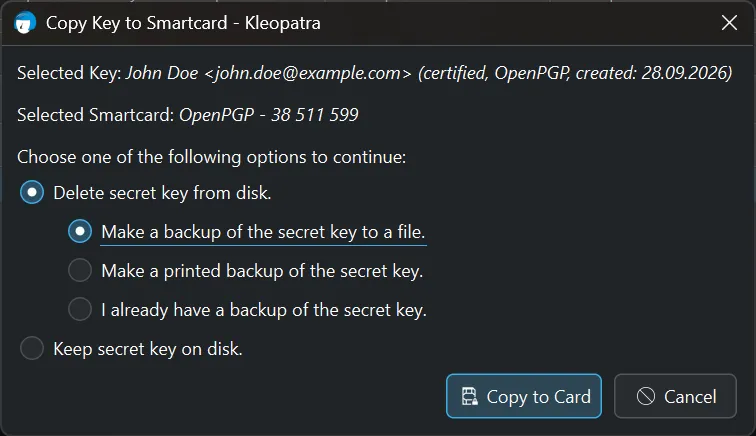
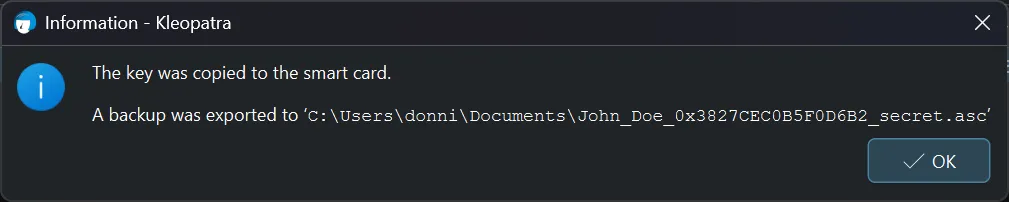
Ensure that the option to "Delete secret key from disk" is selected. You should select either "Make a backup of the secret keys to a file" or "Make a printed backup of the secret key" according to your preferences. In case you create the backup as a file, you must ensure that it is stored in a secure location such as a Cryptomator vault.
Note and check that the backup does exist at the mentioned location.
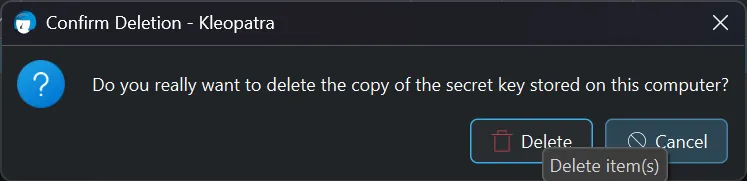
Delete the secret keys stored on the computer.
Verify the Smart Card
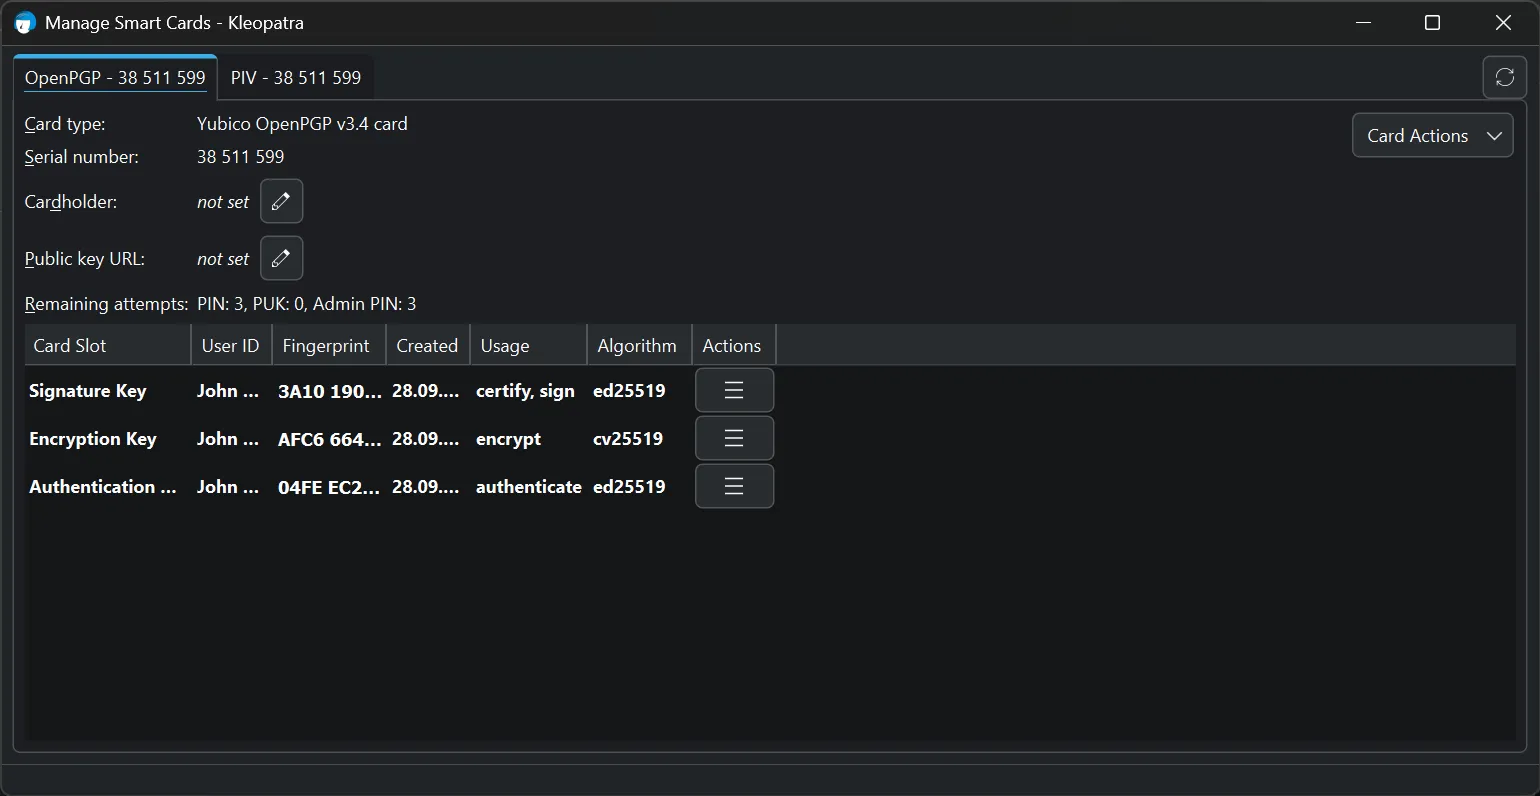
Click on "Smartcards" in the toolbar and verify that the smart card's Card Slots are populated.
Conclusion
Benefit of Smart Cards
The smart card stores the secret keys in a protected environment from which the key material cannot be exported. Cryptographic operations are performed directly on the device, allowing you to use your smart card and the associated keychain without exposing the secret keys to the host system.
Once the required software is configured, simply connect your smart card via USB, NFC or any other supported connection standard and you are ready to go!
Instead of distributing your key pair to machines, all you need to do is to announce your public key and bring your smart card with you. Keep in mind that compromised software on a system may be able to use an unlocked smart card for cryptographic operations without being able to extract the secret keys.
Various Uses
You can use the keychain and smart card for many scenarios such as signing Git commits, authentication as well as encrypting data and communications. By keeping a backup in a secure location, we ensure that we do not lose our secret keys and therefore keep access to encrypted data and accounts when disaster strikes. This setup is ideal for personal use.
What's next
The next part in this series will show you how to use the newly generated keychain and smart card to sign Git commits as well as for OpenSSH authentication on Windows, WSL2 and inside Dev Containers.